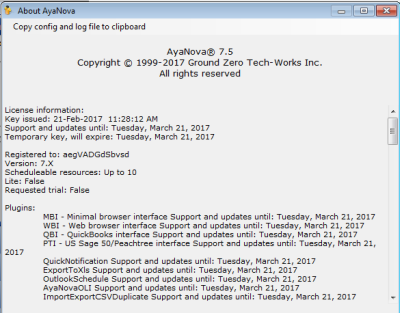
Compare the AyaNova version listed on our Download web page with your version listed in Help -> About AyaNova to determine if your version needs updating.
NOTE: the version stated in the screenshot below may not be the actual latest version. Refer always to the latest available via https://www.ayanova.com/download.htm
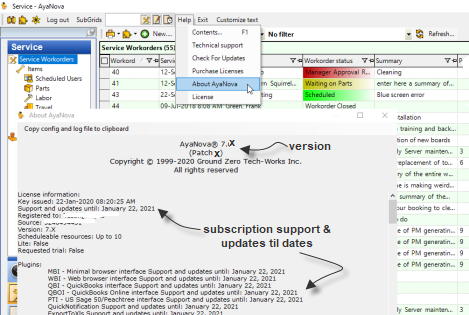
NOTE: the version stated in the screenshot above may not be the latest version. Refer always to the latest available via https://www.ayanova.com/download.htm
Steps to update an AyaNova network SQL Server configuration (version 4 through 7):
1. Requirements before proceeding
2. Create backup of your SQL Server AyaNova database
4. Apply your AyaNova subscription license(s) Activation Key
6. Prep and install AyaNova 7 on networked computers
7. Install and configure AyaNova 7 optional programs on the server
8. Confirm your backup and restore procedures for SQL
1. Confirm these four requirements BEFORE proceeding:
Do not proceed until you have confirmed yes to each of these requirements:
1) CONFIRM Do you know your AyaNova Administrator login name and password?
i.You NEED to know this to be able to correctly and fully perform the update in the steps further below. Failure to confirm this before you proceed may cause issues that may only be resolved by restoring from backup and redoing the update steps.
ii.If you don't know it, it could still be the default login name manager and password letmein - try it and confirm!
iii.If you do not know your AyaNova Administrator username and password, log in as another user that does have rights to the Administration Users grid, and edit the AyaNova Administrator username and password. It would be suggested to write down that username and password and keep in a safe place for future use too.
2) CONFIRM Do you have an active support & updates subscription as shown in your AyaNova database?
i.Log into your AyaNova, select Help -> About
ii.View your database's "Support and updates until:" date:
1.If your About AyaNova does not show a "Support and updates until:"
a.this means your present version is older than version 7.4, AND you MUST purchase subscription(s) for your database before proceeding to the next requirement.
2.If your "Support and updates until:" date has passed:
a.this means your subscription(s) have expired; AND you MUST purchase subscriptions for your database before proceeding to the next requirement
b.OR this means your subscription(s) have expired and you have not yet applied your latest renewal AyaNova license key for your renewed subscriptions.
3.If your "Support and updates until:" date is a future date:
a.this means you do have an active support and updates subscription, and you can proceed to the next requirement.
3) CONFIRM Does your version of AyaNova program files require updating?
1)Refer to your Help -> About AyaNova to view your version
2)Compare your version in your Help -> About AyaNova to that of the latest version at https://www.ayanova.com/download.htm
3)Any questions, do include all text from your Help - About AyaNova when contacting support.
A.If your AyaNova version is already at the latest version shown at https://www.ayanova.com/download.htm :
4)If you have received a new or renewal subscription AyaNova License Key via email, just apply it as per its instructions for a database that is already at the latest version.
5)That's it, you are done! No further update steps are needed.
B.If your AyaNova is version 7.4 or newer BUT not the latest version AND your Support and Updates until: is currently valid by showing a future date:
1)As your subscription(s) are active and not expired, your database is eligible to upgrade as well as receive support.
2)Go ahead and follow the steps below to update your AyaNova.
i.NOTE: Skip the steps below related to applying a Subscription Activation Key as your database already has its current Subscription Key applied
C.If your AyaNova is version 7.4 or newer BUT not the latest version, AND your Support and Updates until: has expired by showing a date that has past:
1)As your subscription(s) have expired, you will need to purchase new subscription(s) before proceeding.
2)Once you have received your AyaNova License Key email message, perform the update steps below.
D.If your AyaNova is between version 7.0 and 7.3
1)purchase your resource and optional add-on subscriptions
2)Once you have received your AyaNova License Key email message, perform the update steps below.
E.If your AyaNova version is 6 or older:
1)purchase your resource and optional add-on subscriptions.
2)Confirm your report templates (that you normally use) run successfully with the latest version of AyaNova.
i.Download and install the latest AyaNova onto a separate stand-alone computer with a sample database.
ii.Export your custom report templates to files.
iii.Import into your testing setup of the latest version of AyaNova.
iv.Confirm your custom report templates load successfully with your testing setup of the latest version of AyaNova
v.If you encounter errors attempting to load your custom report template, refer to https://forum.ayanova.com/t/report-error-issue-for-some-ayanova-7-users/1987 and https://forum.ayanova.com/t/report-error-issue-for-some-ayanova-6-users/1832 to confirm the errors indicate that the report template must be replaced.
vi.Obtain copies of the latest sample report templates via https://www.ayanova.com/reporting.htm#replacement and customize as needed.
3)Proceed with the update steps below
4)Once the update is complete, you would remove the non-working report templates and import your new customized report templates into your live upgraded AyaNova
If have not previously purchased a subscription:
Subscriptions are required to receive support and to be able to apply upgrades to the latest version.
Refer to answers to common questions about licensing, pricing, purchasing on http://www.ayanova.com/purchase.htm
and/or contact us with all text from your present Help -> About AyaNova
If you had previously purchased subscription(s) but allowed your subscription to expire without paying the renewal(s):
Only active (non-expired) subscriptions are eligible for support and upgrades.
Only active (non-expired) subscriptions are eligible to renew at the discounted renewal subscription price.
You will need to purchase your subscriptions again, at the full subscription price.
If you have an active subscription with an upcoming expiration date for support and updates:
Your registered email address will receive a reminder from our payment processing partner that your renewal subscription will automatically be processed if your payment method is valid.
NOTE: your renewal at the discounted renewal price can only occur if your payment method provided (such as your credit card's expiry date) is valid.
Follow the email instructions to check your payment method is valid before the purchase date to ensure no loss of access to purchase at the discounted renewal price.
If your existing payment method with our payment processing partner is valid, your renewal subscription Key will be emailed following the process of the renewal charges (Monday to Friday).
If any issue or did not receive, contact us immediately with your details.
4) CONFIRM Is your existing SQL version supported by Microsoft, is your SQL optimized, have you edited the StartUp Parameters ?
a)As of 2019, Microsoft no longer provides mainstream support of SQL 2012 or lower.
b)Additionally, you may want to look into whether you have optimized your SQL yet
c)Additional StartUp Parameters to enter when using SQL 2012 or newer
2. Create backup of your SQL Server AyaNova database and edited files
a. Make sure all users and all AyaNova related programs connecting to the database are shut down fully.
•Make sure all users have exited out of the AyaNova program
•Make sure all remote access options are shut down via your IIS (i.e. Data Portal, WBI and/or MBI)
•Make sure that your application pool(s) used by your AyaNova remote access options are shut down
•Make sure the network Generator service is shut down
b. Make a backup of your AyaNova database using an approved SQL Server utility such as SQL Server Management Studio
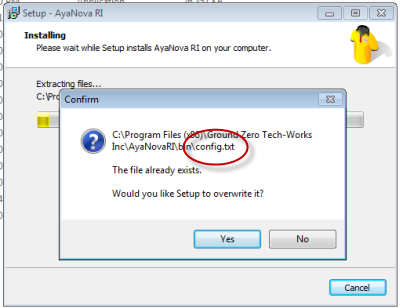
c. Make a backup of your config.txt file so that you can refer to it/copy back if needed in steps further down
Either follow A or B below.
If you encounter an issue following A, then restore and start from step 1 this time following B when get to this step
3.A. Install over top of existing AyaNova desktop program on your server
a. Make sure every AyaNova program and service is shut down unless specifically identified to run. Failure to do so will result in needing to restore from backup and performing the steps again.
•On your server:
oconfirm that your Generator service is shut down
oconfirm that your IIS application pool(s) for your AyaNova remote access options are all shut down
oconfirm that any AyaNova desktop program and option is shut down
•On your workstations:
oconfirm that any AyaNova desktop program and option is shut down
b. Download the latest AyaNova 7 setup file from https://www.ayanova.com/download.htm
c. Install taking the check-marked previous selections that are already selected - this is OK, as long as you do not run before stated to do so
When installing overtop of an existing installation, select No when receive the following message (so that you keep your existing custom config.txt confiugration connection file)
d. Continue with step 4.
3.B. Remove all AyaNova programs from the server -> install stand-alone -> copy back config.txt
a. Make sure every AyaNova program and service is shut down unless specifically identified to run. Failure to do so will result in needing to restore from backup and performing the steps again.
•On your server:
oconfirm that your Generator service is shut down
oconfirm that your IIS application pool(s) for your AyaNova remote access options are all shut down
oconfirm that any AyaNova desktop program and option is shut down
•On your workstations:
oconfirm that any AyaNova desktop program and option is shut down .
b. It is recommended to uninstall any previous AyaNova programs via Control Panel -> Add/Remove Programs before installing a new version
•Uninstall plugins if installed OLI, OutlookSchedule, ExportToXLS, QuickNotify, AyaScript
•Uninstall WBI, MBI, RI
•Uninstall AyaNova
oif option to delete installed databases is displayed, select Yes. These would be the stand-alone sample trial databases from your original install that should have been removed anyways.
c. Download the latest AyaNova 7 setup file from https://www.ayanova.com/download.htm
d. Install as per stand-alone AyaNova installation steps (do not select to install anything else at this time - do NOT select to install the Generator, etc)
e. Run the AyaNova 7 program
f. Because this is a fresh install including installation of a sample database, the default AyaNova Administrator login and password will be pre-entered for you.
g. Log in and confirm loads successfully. Yes, it is expected that this opens to sample data, don't freak out.
h. Exit out.
i. Delete the existing sample database config.txt file in your AyaNova program folder.
j. Paste in the backup of your original config.txt file
k. Continue with step 4.
(Generator install, remote access options and other options would be installed at a later step below)
4. Apply your AyaNova subscription license(s) Activation Key **if applicable**
**this step #4 will not occur if your existing AyaNova has an active current valid scheduleable resources subscription and is version is 7.4 or higher**
a. Run the AyaNova 7 desktop program on your server
b. Log in as your AyaNova Administrator account
c. The following message will display (reminder - this will ONLY display if your AyaNova does not presently have an active current valid subscription and is version 7.4 or higher)
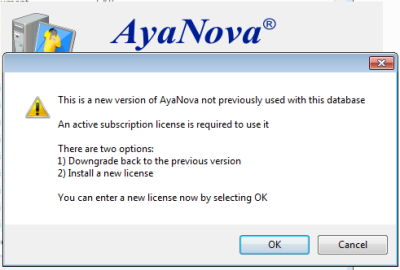
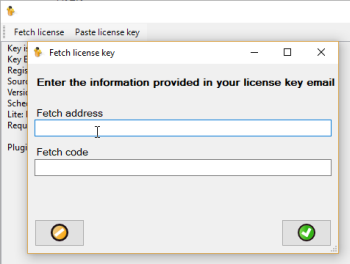
d. Click on Fetch License as per your Activation Key email instructions
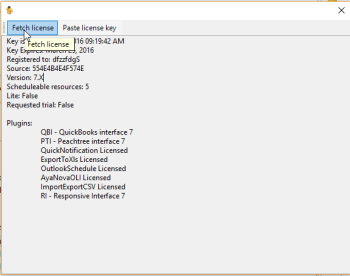
e. Enter in your registered email address into the Fetch address field, and your Fetch code into the Fetch code. Click on the green checkmark OK button to complete the fetch (internet access is required)
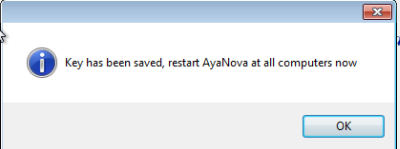
f.Select OK and AyaNova will close. We are not done yet! Go to the next step.
Run the AyaNova 7 program.
i. Log in as the AyaNova Administrator.
You MUST log in only as the AyaNova Administrator this first time.
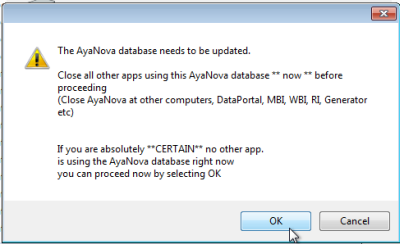
j. As per the message, make sure no one and nothing is accessing the AyaNova database
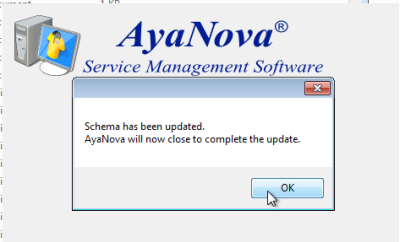
k. Schema update won't take long - let it finish!
l. Check your Help -> About AyaNova to confirm your licenses and to confirm your version.
m. Now you can complete the update on the workstations and install any other options.
6. Prep and install AyaNova 7 on networked computers
a. perform step #7 of the network SQL Server configuration on your workstations so they too are updated to the latest AyaNova 7 program version.
b. Install and configure your licensed AyaNova 7 optional plugins (i.e. ExportToXLS, OLI, OutlookSchedule)
When installing overtop of an existing installation, select No when receive the following message (so that you keep your existing custom config.txt confiugration connection file)
7. Install and configure AyaNova 7 optional programs on the server (Event Generator, RI, WBI, MBI, and/or DataPortal) as needed
It is recommended to install after having uninstalled, so no accidental
See in this Help documentation:
•AyaNova Network Generator installation steps
•AyaNova Data Portal installation and configuration steps
•RI installation and configuration steps
•WBI installation and configuration steps
•MBI Help file for requirements, installation, configuration and use
When installing overtop of an existing installation, select No when receive the following message (so that you keep your existing custom config.txt confiugration connection file)
8. Confirm your backup and restore procedures for your AyaNova SQL database
See also: