Read through all instructions first before proceeding.
Make sure you have the latest Windows operating system service patches installed before proceeding.
If you perform the installation via a remote connection and encounter any issues, first always recheck that each step was fully completed successfully before going to the next. If still an issue, perform the installation while physically at the server and redo all steps from scratch again.
The oldest version of SQL Server version that can be used with AyaNova is 2008 R2. You can use the latest version of SQL Server or any version 2008 R2 or newer. It would be recommended to use the latest version, along with the latest SSMS (SQL Server Management Studio).
It is HIGHLY recommended to make yourself aware of any known issues about SQL before proceeding, including those identified in our AyaNova Support Forum
It is your responsibility to be knowledgeable about SQL databases, especially about how to backup.
Use of AyaNova with SQL Server is a 7 step process
1.Ensure network uses TCPIP for communication between computers and server
2.Stand-alone AyaNova database, AyaNova program and To SQL utility
3.SQL Server is installed and configured
4.Set exceptions in server's firewall for SQL
5.Creation of SQL Server AyaNova database
6.Configure and confirm access for the AyaNova program on the server to the database
7.Configure and confirm access from network computers to networked database
1. Ensure network uses TCPIP for communication between computers and server
•The server and networked computers will communicate via TCPIP. If your network is not yet configured, do so. If you are not experienced with this, please contact your local computer center.
•To confirm whether your network can communicate or not, determine the server’s static internal IP address and ping from a local area networked computer
a. Open a command prompt on the server (Start -> Run -> type in cmd and click on OK) and type ipconfig in the DOS prompt
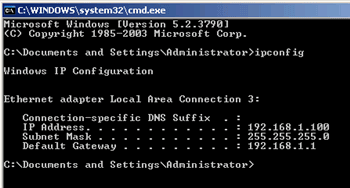
b. Make a note of your server’s IP Address
c. Confirm that network computers can “talk” to the server by opening a command prompt on a local area networked networked computer and typing ping xxx.xxx.xxx.xxx and the Enter key where xxx.xxx.xxx.xxx is the IP address of your server
For example, if your server's IP address is 192.168.1.15, you would type ping 192.168.1.15
If you get a timeout, there is an issue connecting via TCPIP. Please contact your local computer center to troubleshoot.
2. Stand-alone AyaNova database, AyaNova program and To SQL utility is installed to server
a. Install the stand-alone AyaNova database and program to the server's local hard-drive while logged into that server itself. Refer to Stand-alone default AyaNova installation
•You must also select to install the Install Firebird SQL to Microsoft SQL migration utility as this is the utility to create the AyaNova SQL database ToMSSQL.exe
![]()
•Once you have completed all of the network steps, you can remove the AyaNova program from the server itself if you do not want the program files on it and won't be installing any optional add-on's such as Data Portal, Generator, etc. Do note though, that having AyaNova program files on the Firebird Server does not hamper it in any way, and takes up a maximum of 50MB in space; and provides you with a location to confirm your setup with AyaNova Support in the event you experience an issue.
b. Once installation is complete, run the AyaNova program and confirm you can log in successfully
c. Exit out of the AyaNova program
3. SQL Server installation / configuration
a. The oldest version of SQL Server version that can be used is 2008 R2. You can use the latest version or any version 2008 R2 or newer. It would be recommended to use the latest version, along with the latest SSMS (SQL Server Management Studio).
•Refer to the steps SQL Express example installation as settings to select for SQL Server are similar
•It is HIGHLY recommended to make yourself aware of any known issues about your version of SQL before proceeding, including those identified in our AyaNova Support Forum
b. Once installation is complete with the settings set as per the SQL Express example installation , reboot your computer, log in as the computer administrator, and confirm your SQL services have successfully started and are running
4. Set exceptions in server's firewall for SQL
If there is a firewall enabled on your "server" computer where the SQL configuration is installed and setup, set exceptions for sqlserver.exe and sqlbrowser.exe (check the path of your SQL services to confirm the specific path and file name), and/or TCP or UDP port 1434 and 1433 in some cases.
If unfamiliar with setting firewall exceptions, your best suggestion would be to perform a search online for your server's operating system (i.e. perform a search for Windows 10 firewall exceptions port program)
TIP: If after all steps are completed and AyaNova successfully loads on the server, but does not on a local area network computer, that may indicate that your firewall settings are restricting access.
You can confirm the issue is due to your firewall or not, by turning off your firewall to troubleshoot.
5. Creation of SQL Server AyaNova database
a. Via the server's Start menu, select to run AyaNova -> Utilities -> Firebird to MSSQL

b. This will open the ToMSSQL utility
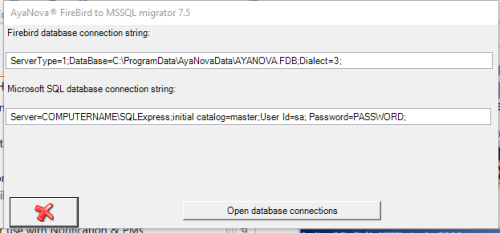
c. You now need to edit the connection strings to what you actually have
Firebird database connection string:
This MUST identify the location of your actual existing AYANOVA.FDB database file.
•If you installed for standalone use to a Windows 7 or newer computer, the default location and file is C:\ProgramData\AyaNovaData\AYANOVA.FDB
•
•If you installed for standalone use to an old operating systems such as XP or 2003, the default location and file is C:\Documents and Settings\All Users\Application Data\AyaNovaData\AYANOVA.FDB
•
•OPEN YOUR Windows Explorer and actually confirm that YOUR AyaNova database file AYANOVA.FDB is in the path stated before proceeding.
•Whereas if instead you had previously configured AyaNova for network Firebird use but are now converting to SQL, you will need to edit the entire string so that it reflects your networked AyaNova Firebird database such as the example string below:
ServerType=0;DataSource=SERVERIPADDRESS_OR_NAME;DataBase=AYANOVA;User=SYSDBA;Password=masterkey;Dialect=3;
(where SERVERIPADDRESS_OR_NAME is your network Firebird server's name or ip address, where AYANOVA is the database name you set in the aliases.conf, and where masterkey is the password you set for your Firebird Server)

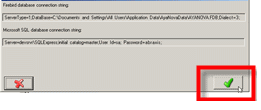
Microsoft SQL database connection string:
The Microsoft SQL database connection string defaults to an example SQL Express configuration string. You must change it so it uses the following format:
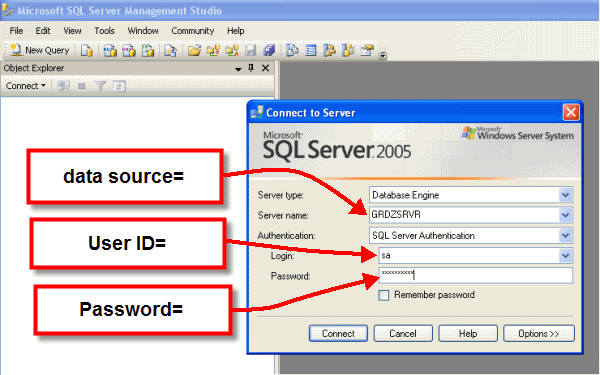
data source=SQL_SERVER_NAME;initial catalog=master;User Id=USERNAME; Password=PASSWORD;
(where SQL_SERVER_NAME is your SQL Server name, USERNAME is a SQL user with full rights to the SQL Server such as user "sa", and PASSWORD is that SQL user's password. And note also that the initial catalog is master for this utility)
So if your SQL Server is called GRDZSRVR and your SQL Server full administrative username is sa and the password is letmein, then your string would look like:
data source=GRDZSRVR;initial catalog=master;User Id=sa; Password=letmein;
Do note you can also find what the name is of your SQL Server by running SQL Management Studio as is identified in the Service name: field.
d. Select Open Database Connections to test your connection strings
![]()
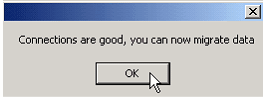
•As the message says, it will now confirm connection to the original AyaNova database, and to the SQL server.
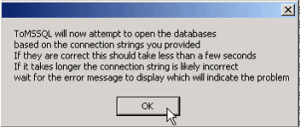
•If the connection strings are not correct, a message will appear that you need to correct them - there may be an incorrect text entry in either the Firebird database connection string or the Microsoft SQL database connection string – check your punctuation, your spelling, your database location, your server name, your server password etc and retry
e. You will receive a message if connection is successful – select the OK button to proceed to create the SQL AyaNova database.
f. When finished at 100%, select the cancel button to close (the X) – wait until both lines show at 100%
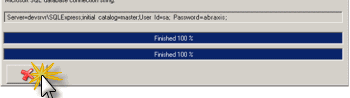
g. The AyaNova SQL database has now been successfully created
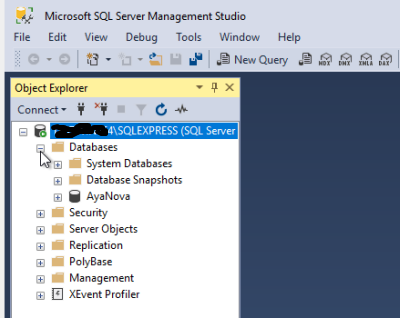
You can also confirm by logging into your SSMS (SQL Server Management Studio) and confirming your SQL AyaNova database is there.
6. Configure and confirm access for the AyaNova program on the server to the database
a. Delete the existing config.txt file in the C:\Program Files (x86)\Ground Zero Tech-Works Inc\AyaNova (or C:\Program Files\... if 32 bit) folder
b. Move to the C:\Program Files (x86)\Ground Zero Tech-Works Inc\AyaNova/examples folder
c. Copy the EXAMPLE_MSSQLSERVERconfig.txt file
d. Move back to the C:\Program Files (x86)\Ground Zero Tech-Works Inc\AyaNova folder
e. Paste in the EXAMPLE_MSSQLSERVERconfig.txt file into the C:\Program Files (x86)\Ground Zero Tech-Works Inc\AyaNova folder
f. Rename this file to config.txt
g. Edit this new config.txt using NotePad
•Do not use any other program but NotePad to edit this file
•Edit data source= to your SQL Server's name
•Edit User ID= to a SQL server username with full rights (suggested to use user "sa")
•Edit Password= to the password of that SQL user (Reminder: Do NOT use special characters in your sa password (such as # % $ etc) - your SQL will not accept the connection and there may not even be any error messages explaining why when you go to run your AyaNova)

h. Now run the AyaNova program and confirm you can log in.
7. Configure and confirm access from network computers to networked database
a. Copy your network SQL Server configured config.txt file from the C:\Program Files (x86)\Ground Zero Tech-Works Inc\AyaNova folder to a shared location that your networked users can access.
b. Copy/Move to this same shared folder the AyaNova installation file AyaNovaSetup.exe that you used to install on the server. Now that you have confirmed it works you can re-use it at all work stations.
c. Have each local networked computer run the AyaNovaSetup.exe file from that shared location that also has the edited config.txt in that same shared location. When a network setup is run it will automatically use the config.txt file it finds in the same folder as the setup program.
•Make sure the at the networked computer to select Network administrator setup
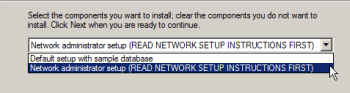
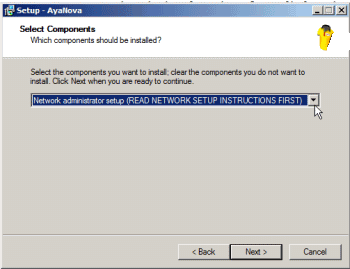
•If the local networked computer will also run QBI, or PTI or perform an import, select when installing on that computer those optional AyaNova programs. Refer to the QBI Help documentation or PTI Help documentation available from the AyaNova website if using QBI or PTI. Refer to the appropriate ImportExport.csv utility section in this help file if using one of the import utilities.
•The AyaNovaSetup.exe will "see" that config.txt file and automatically copy it to that computer's AyaNova program directory so no additional configuration is needed on that user's station.
•The install will only install the AyaNova program files it has been told to install, will copy that config.txt file to the networked workstations AyaNova program folder and will not install a trial database.
•The AyaNova installation will place a desktop icon for AyaNova on the desktop as well as in the start menu.
•TIP: If after all steps are completed and AyaNova successfully loads on the server, but does not on a local area network computer, that may indicate that your firewall settings (step 4 above) are restricting access. You can confirm the issue is due to your firewall or not, by turning off your firewall to troubleshoot.
•You can confirm that AyaNova is configured correctly on the networked computer by logging in on that networked computer, selecting Help -> About AyaNova so that you know that you are correctly connecting to the networked SQL Server configuration
•If you do not want your networked users to see the SQL Server sa user's password as it is in their config.txt, you might want to edit the config.txt that you copy to that shared location for networked computers to use integrated security. If so, once you have copied over the config.txt to its shared location and before networked users set up AyaNova using that config.txt, remove the User Id= sa; Password = xxxx; replacing it with integrated security=true; Of course, do confirm this works as in the screenshot below:

Refer to Network Generator installation steps to install and configure the Event Generator in a network setup if applicable.
Refer to the Data Portal installation and configuration steps to install and configure the AyaNova Data Portal if applicable.