Configuration of the Data Portal differs depending on the operating system in use.
Below are first after that are the steps for Windows 7 and newer and than second the steps if using an older OS such as Windows XP Pro or Windows 2003
Data Portal Configuration Steps to perform if Windows 7 or newer
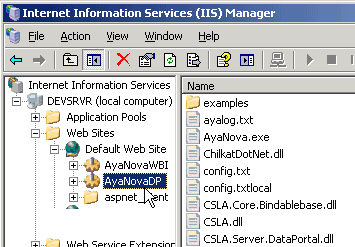
A. After installation has completed, open the IIS Manager and confirm that AyaNovaDP is present
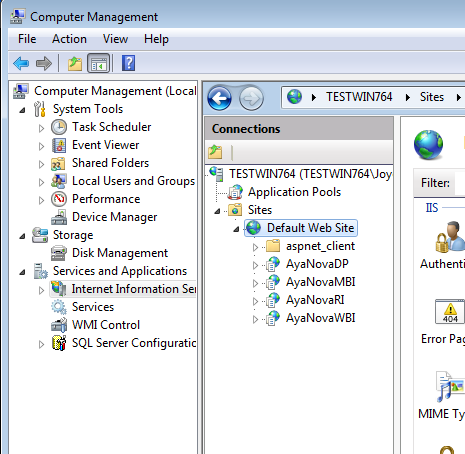
image displayed includes all remote access options installed following the basic steps. your layout under Default Web Site may be different.
B. Confirm what the external static IP address is for your router/firewall (as your remote users will use that ip address, not a private internal ip)
C.1 If you have a Static IP: (see C.2 below if you have a dynamic IP)
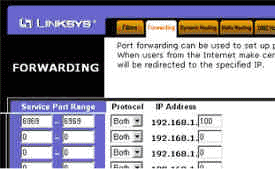
Confirm that your router/firewall is configured to forward port to the database server where the Data Portal will be set up
•Refer to your firewall documentation for setting up forwarding as every firewall is different and we would not be able to put here examples of every type available.
•Contact a networking professional if you have any questions about firewall configuration
•in our example screenshot below for our example LinkSys router - the forwarding port we have set is 6969 for the database server’s internal IP address of 192.168.1.100
C.2 If you only have dynamic IP
You can certainly use a dynamic IP address for your public router/firewall, but of course as dynamic ip changes constantly, you and your staff would need to know what the changed IP address is every time it changes.
OR
If your company is unable to obtain a static IP address, a possible suggestion may be to follow https://forum.ayanova.com/t/yes-you-can-use-dns-and-your-dynamic-ip-address-to-set-up-remote-access/2311
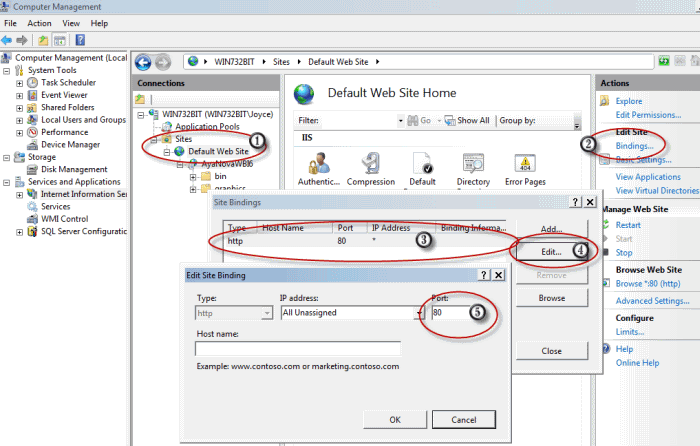
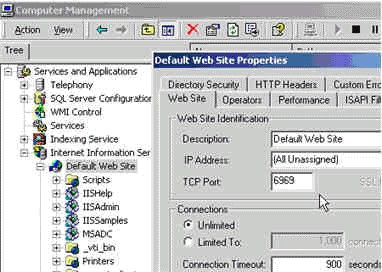
D. Confirm that IIS is configured for this same port (or vice versa of course)
•In our example screenshot below, the Port is 80 for the Default Web Site.
•So would need to edit the port for the Default Web Site to 6969 to match that set for the router example above.
E. There is no editing of a web.config file because AyaNovaDP uses the same config.txt that the AyaNova program file uses to connect to the networked database.
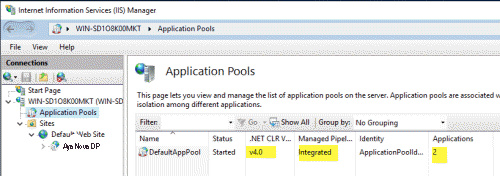
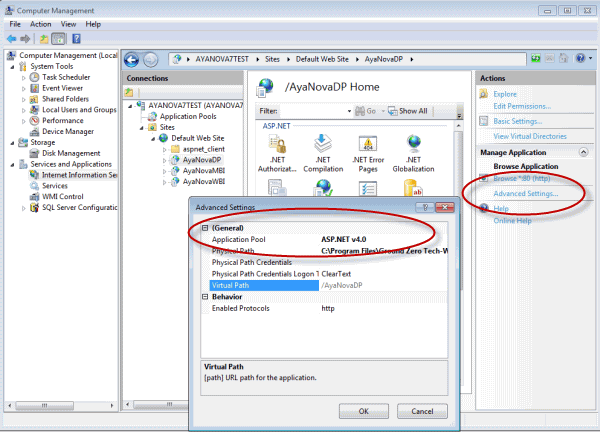
F. View the Advanced Settings for the AyaNovaDP web site, and select to use the Application Pool ASP.NET v4.0
•This ASP.NET v4.0 app pool is created automatically for you when you installed the IIS components in Step #1 - Data Portal Installation with .NET 4 installed
•The application pool uses managed pipeline mode of Integrated with .NET 4 Framework
•If this App pool is not listed, you may need to re-registered ASP.NET 4 with your IIS by running "%windir%\Microsoft.NET\Framework\version\aspnet_regiis.exe" -i at command prompt where %winver% is the Windows directory for your operating system, and version represents the version number of the .NET Framework that you installed on your server. Don't forget to reboot after.
Example screenshot of the application pool on a Windows 2019 Server:
Example screenshot of Windows 7:
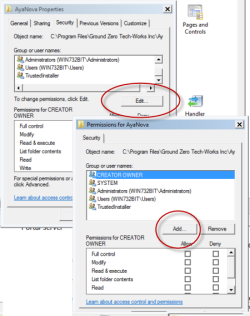
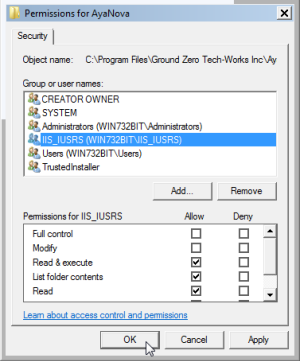
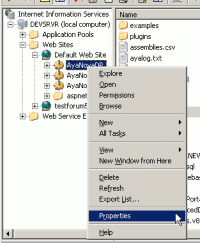
G. Check that IIS_Users has permissions for Default Web Site
Right-click on Default Web Site -> Select Edit Permissions... -> Select the Security tab
This should be there by default - if not, may be indicative of issues with your IIS. Try adding manually.
Example screenshot shows beginning of how to do this which is click on Edit -> than Add... -> Advanced -> Find Now -> scroll down and click on IIS_USERS and OK till now showing.

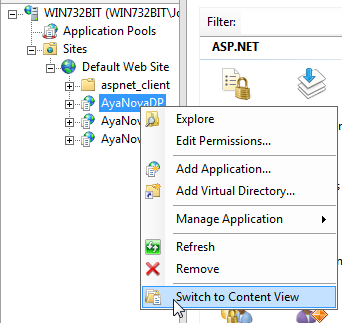
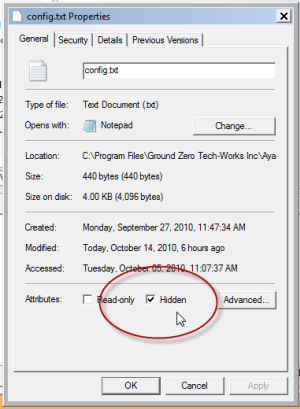
H. The following are additional rights settings you may want to set so that external users can not view the contents of the config.txt file
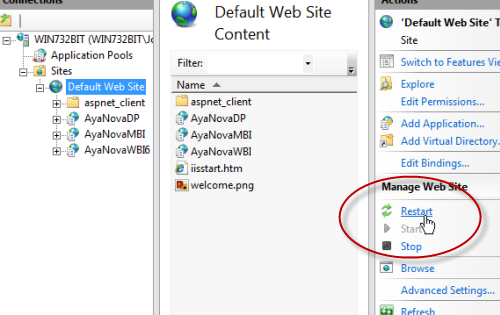
1. Switch to Content View for AyaNovaDP
3. Right-click on the config.txt file and edit permissions
4. Check-mark Hidden
I. Restart the default web site
J. Continue to Testing
DataPortal Configuration Steps to perform if using older OS such as Windows XP Pro or Windows 2003:
A. Open the IIS Manager and confirm that AyaNovaDP is present as an application site under Default Web Site after installing
B. Confirm what the external static IP address is for your router/firewall (as your remote users will use that ip address, not a private internal ip)
C.1 If you have a Static IP: (see C.2 below if you have a dynamic IP)
Confirm that your router/firewall is configured to forward port to the database server where the Data Portal will be set up
•Refer to your firewall documentation for setting up forwarding as every firewall is different and we would not be able to put here examples of every type available.
•Contact a networking professional if you have any questions about firewall configuration
•in our example screenshot below for our example LinkSys router - the forwarding port we have set is 6969 for the database server’s internal IP address of 192.168.1.100
C.2 If you only have dynamic IP
You can certainly use a dynamic IP address for your public router/firewall, but of course as dynamic ip changes constantly, you and your staff would need to know what the changed IP address is every time it changes.
OR
If your company is unable to obtain a static IP address, a possible suggestion may be to follow https://forum.ayanova.com/t/yes-you-can-use-dns-and-your-dynamic-ip-address-to-set-up-remote-access/2311
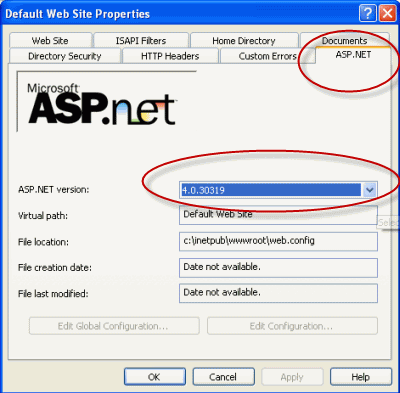
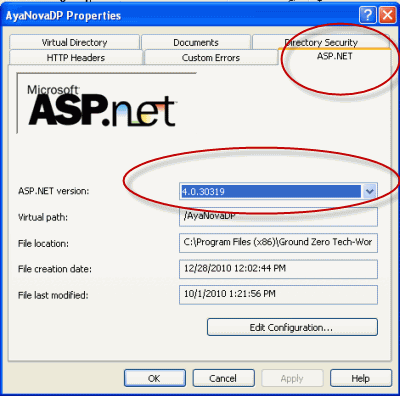
D. Confirm that the ASP.NET tab in the Default Web Site is set to use the Microsoft.NET Framework 4
E. Confirm that the Default Web Site in IIS is configured for this port
•In our example, we have the TCP Port as 6969 for the Default Web Site because as the above example, we want to have remote users forwarded to port 6969 onto the server.
F. There is no editing of the web.config file because AyaNovaDP uses the same config.txt that the AyaNova program uses to connect to the networked database.
G. Confirm that AyaNovaDP web site is using Microsoft.NET Framework 4
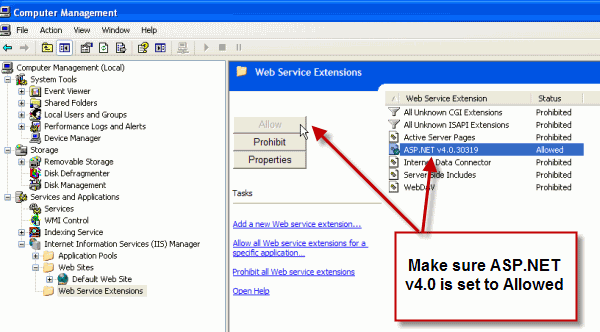
H. If using an older OS such as Windows 2003 or Windows XP 64 bit, select the Web Service Extensions and make sure is set to Allowed (if not set to Allowed, will get 404 error Page Not Found when performing step N)
NOTE: If you do not see this extension listed, it may be because your ASP.NET needs to be re-registered to work with IIS again by running "%windir%\Microsoft.NET\Framework\version\aspnet_regiis.exe" -i where %winver% is the Windows directory for your operating system, and version represents the version number of the .NET Framework that you installed on your server. You must replace this placeholder with the actual version number when you type the command.
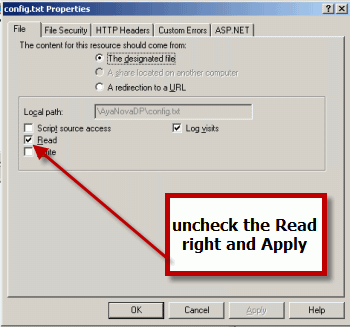
I. The following are additional rights settings you may want to set so that external users can not view the contents of the config.txt file
1. Open the IIS Manager or Computer Management
2. Right-click on config.txt that is within the folder of the AyaNovaDP site
3. Select Properties
4. Un-check the Read right, and save.
J. Stop and Start the default web site
K. Continue to the testing steps