When your client logs into WBI, the following WBI Client pages are available:
•the Client Service Request grid;
•or if select to create a new service request, the Client Service Request entry screen;
•or the Workorders grid from where they can select the workorder number to view its report or the Wiki link to view the wiki page for that workorder.
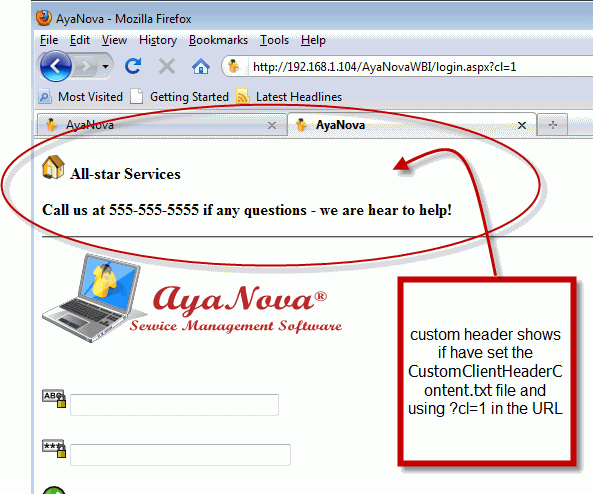
You can include additional text on the header of these pages or the footer of these pages or both header and footer, as well as display on the login page.
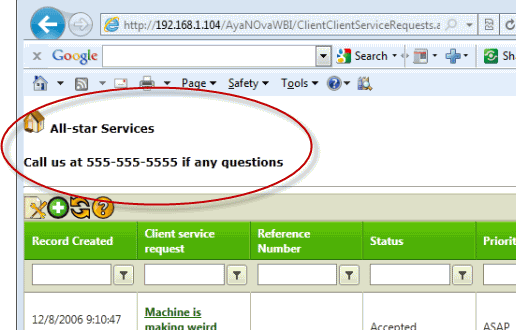
For example, you might want to include in the header of each of these pages your company logo and your telephone number to provide assurance to your client they are logged into the correct website and to provide additional means of contact if they have any questions.
The WBI setup file will install two example files to the folder C:\Program Files (x86)\Ground Zero Tech-Works Inc\AyaNovaWBI:
xxCustomClientHeaderContent.txt
xxCustomClientFooterContent.txt

If WBI sees a file called CustomClientHeaderContent.txt, it will load its HTML code as the header for the Client's WBI
If WBI sees a file called CustomClientFooterContent.txt, it will load its HTML code as the footer for the Client's WBI
Rename the xxCustomClientHeaderContent.txt file to CustomClientHeaderContent.txt
Open the CustomClientHeaderContent.txt file using Notepad
Example HTML code will be in this text file.

Edit as you wish, using HTML code
For example, the code listed below

You will need to restart the IIS application pool for your AyaNova WBI so that this change is identified.
Either recycle the application pool assigned to your AyaNova WBI; or restart your server; or edit a comment area of the WBI's web.config
Log in as a client and confirm that your header now shows as edited.
Same as above steps, but rename the xxCustomClientFooterContent.txt file to CustomClientFooterContent.txt, and edit that file, etc etc.
For the custom footer and header to show on the login page:
Perform the steps above, but append to your URL that you provide to your client the text ?cl=1
For example, if the URL your client uses to bring up your WBI login page is normally http://192.168.1.104/AyaNovaWBI/login.aspx, provide to your client the following URL link instead
http://192.168.1.104/AyaNovaWBI/login.aspx?cl=1
This way the custom footer/header/both will display on the login page itself