Do note that All Items - Export Outlook Contacts will also update existing AyaNova objects of the type selected (client, head office or vendor of that type) that have the same name as the Outlook contact being exported, as well as export not yet exported Outlook contacts into your AyaNova.
To export selected Outlook contacts from the Outlook Contacts folder you are viewing into AyaNova as either AyaNova Clients, or AyaNova Head Offices or as AyaNova Vendors of a certain type:
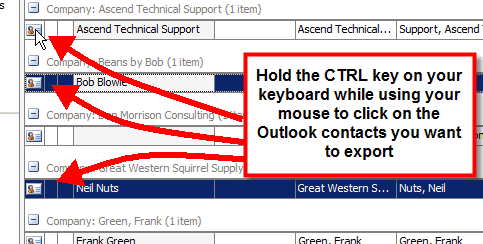
1. View the Outlook Contacts folder you wish to export from
2. Use your mouse and CTRL key on your keyboard to select the specific contacts you want to export into AyaNova
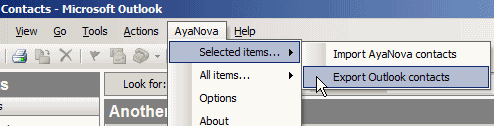
3. Once your Outlook contacts are selected that you want to export, now select the menu option AyaNova -> Selected Items... -> Export Outlook Contacts.
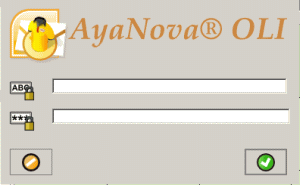
4. If you have not yet been asked to log in via OLI (as have not selected any other menu option since running this session of Outlook), than the OLI login window will appear.
Log in as an AyaNova user that is a member of a security group that has rights to create Clients, Head Offices and Vendors.
5. The Contact export options window will appear.
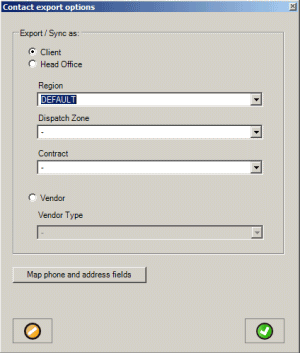
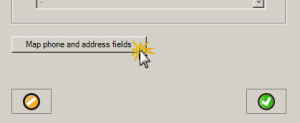
6. If you have not yet mapped phone and address fields between AyaNova and Outlook, do so before proceeding
•If you do not, than your Outlook contacts will not have their phone and addresses exported into AyaNova.
•Refer to the section Map Phone and Address Fields Option
•Do note of course that you can access by the Map Phone and Address Fields button from this window
7. Export Outlook contacts:
a. Export the selected Outlook contacts in this Contacts folder you are viewing into AyaNova as Clients
•Select the radio button for Client
•Identify what Region, Dispatch Zone, and Contract if any you want all of these contacts imported to be set to.
•Select the OK button ![]() to export
to export
b. Export the selected Outlook contacts in this Contacts folder you are viewing into AyaNova as Head Offices
•Select the radio button for Head Office
•Identify what Region, Dispatch Zone, and Contract if any you want all of these contacts imported to be set to.
•Select the OK button ![]() to export
to export
c. Export the selected Outlook contacts in this Contacts folder you are viewing into AyaNova as Vendors
•Select the radio button for Vendor
•Identify what Vendor Type if any you want all of these contacts imported to be set to.
•Select the OK button ![]() to export
to export
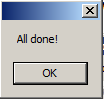
8. If you have a lot of contacts in Outlook, you will see the wait cursor rolling to let you know something is happening. When the export is finished, it will pop up the All Done! message.
9. Do note that Selected Items - Export Outlook Contacts will also update existing AyaNova objects of the type selected (client, head office or vendor of that type) that have the same name as the Outlook contact being exported, as well as export not yet exported Outlook contacts into your AyaNova.
For example:
•You already have an Outlook contact with the Company name: Beans By Bob and you already have an AyaNova client with Client name: Beans By Bob that are the same in all details.
•You edit the phone number of the Outlook contact Beans By Bob and save.
•When you select this option to export Outlook contacts after having selecting the Beans By Bob and select Clients, the AyaNova client Beans By Bob will be updated with the new phone number from the Outlook contact Beans By Bob