In this tutorial we will go through the steps to create a new locale and then customize it so that labels in AyaNova display as you want them to.
•Localization is not just for different languages.
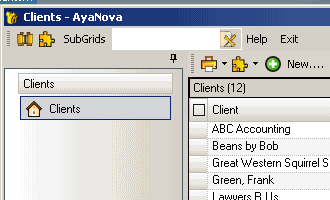
•For example, you may be in property management service and want what is labeled as Clients or Client throughout AyaNova to display as Properties or Property instead
 vs
vs 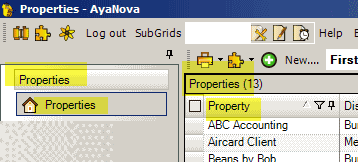
•It is highly recommended that you review this Online Help entire section on Localized Text Designer section for complete overview , suggestions on use, tips on use and more.
There are 4 major steps:
1. Creating a copy of the existing English locale
2. Edit the newly created locale
3. Assign users to use the newly created locale
4. Log in and see the new labels
1. Creating a copy of the existing English locale
1.The English locale is itself not customizable. Only a copy can be of it, and than that copy can be customized.
2.Select the menu option New… from the Localized Text Design menu toolbar
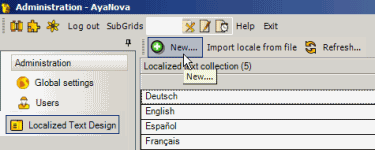
3.Select the source to copy from, and the new locale’s name
a.Select the source locale English
b.Enter in a descriptive name for the custom locale – so that it is easy to know what to select when selecting it for each user within AyaNova.
i.The name field is restricted to no more than 15 characters.
ii.In our example, we entered My Locale
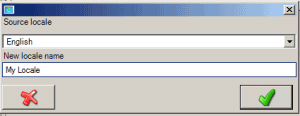
c.Select OK
4.Be patient while it copies all master localized text to this new locale name
5.Your custom Locale now displays.
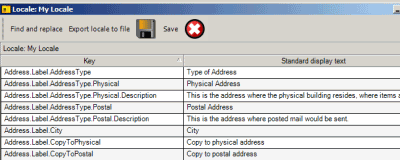
2. Edit the newly created locale
6.A quick way to replace specific text, is to perform a search for it, and replace it with the new text.
a.For example, if we wanted to replace throughout AyaNova all instances of the text label Client with the text Property even when it is part of another label (for example “Client reference #”), perform the following:
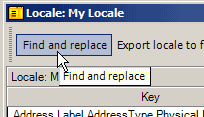
b.Select the menu option Find and Replace
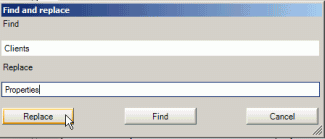
c.Enter in the text Clients in the Find field
d.Enter in the text Properties in the Replace field
e.Select Replace
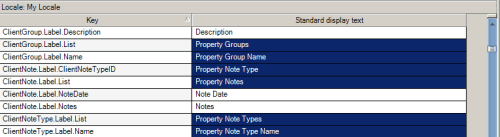
f.If you then scroll down through the grid, the fields that were replaced will be highlighted so you can see

g.You can of course just use the Find option, so that you can manually edit each individually.
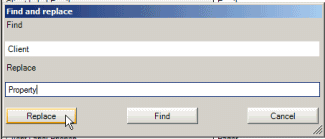
h.Now do the same steps as above but for the text Client to be replaced with the text Property
i.Save & Exit ![]() out of the new locale
out of the new locale
3. Assign users to use the newly created locale
7.Now that your custom locale has been made, edited and saved, you now need to identify each user to use that custom locale
8.Move to the Users grid in the Administration navigation pane
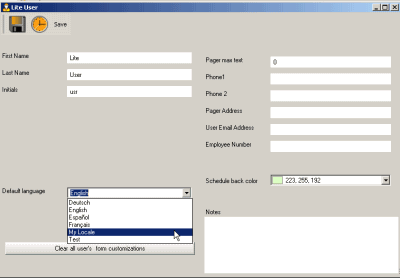
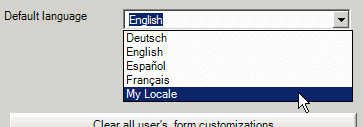
9.Open up the user's entry screen, and edit its Default Language to the newly created locale you just made
10.Save & Exit out of the user's entry screen
11.Continue for every user that you want to use this custom locale
12.Make sure each user exits out of AyaNova and logs back in - as a change in locale does not take effect until the user has completely exited and then next logs in. This is because localized text for labels is loaded only when the user first logs in.
13.Also you can set the Default Language in Global Settings to this new custom locale so any newly created users will default to using this new custom locale
4. Log in and see the new labels
14. Exit out of AyaNova and log in as one of these users that you changed the Default Language to the newly made custom locale
15.You will see that what used to be called the Clients navigation pane is now called the Properties navigation pane
16. Open up a Property entry screen (used to be Client entry screen) and you will see that what used to be called Client Name is now called Property Name
17.Open up a service workorder. You will see that what was previously labeled as the Client jump button is now labeled as Property