NOTE: If on your server you can not or do not want to use a web site off of Default Web Site as per the installation steps, you can manually create a new virtual web site pointing to the AyaNova folder as per the following steps:
1.Perform all steps as per Step #1: Data Portal Installation
2.In IIS Manager, delete the installed web site AyaNovaDP under Default Web Site (this should not remove the installed files)
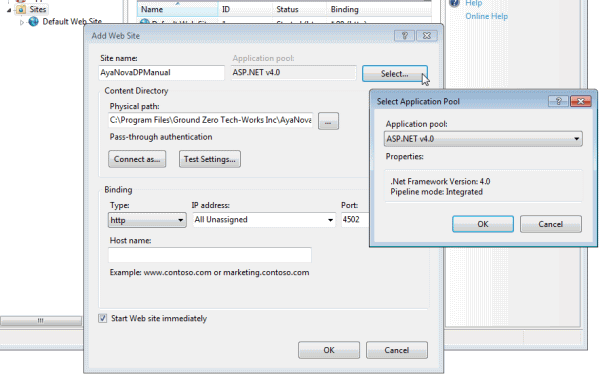
3.In IIS Manager, create a new web site pointing to the C:\Program Files (x86)\Ground Zero Tech-Works Inc\AyaNova (or C:\Program Files\... if 32 bit) folder with its own port #
If using older OS such as Windows 2003:
•Allow anonymous access to the web site
•The web site access permissions must be at minimum Read, Run scripts and Execute
• Make sure .NET 4 is selected in the ASP.NET tab for this new site
•You may or may not have to set the IP Address property of your new website to the computer's actual internal ip address instead of (All Unassigned)
If using Windows 7 or newer:
•Select ASP.NET v4.0 application pool (uses Integrated managed pipeline mode)
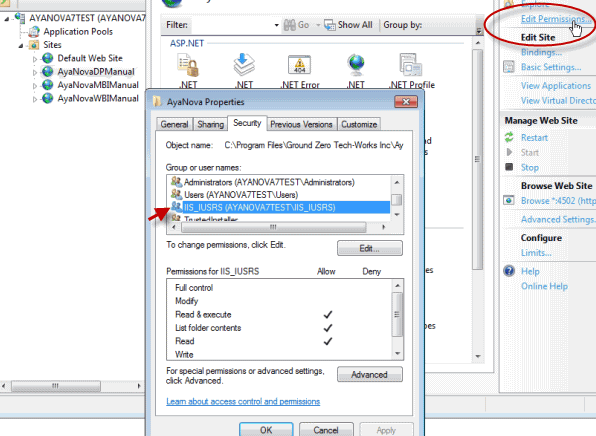
•Right-click on the newly created site, select Security tab, see that IIS_USERS is listed. Add if not.
4.Stop and Start this new web site that you just created
5.As the site is not under Default Web Site, note of course that the port # you set for your router in the Configuration steps would be for this new AyaNova Data Portal site itself, not for Default Web Site.
6.As the site is not part of Default Web Site, the URL for testing would now be http://localhost:xxxx/DataPortal.rem?wsdl where xxxx is the port number you gave when you manually created the site. (or use xxx.xxx.xxx.xxx:XXXX where xxx.xxx.xxx.xxx is the server's internal IP address)