In this tutorial example, we will create a new Summary report template using the Wizard for the Parts grid in the Service navigation pane.
•It is recommended that you review the Report Templates Help section before proceeding for an overview of the Report Designer.
•NOTE: There is not an option to use the internal report designer’s Wizard to create a report template for Detailed datasets such as a Detailed report template for Workorders (or PM or Quotes) because the Wizard is not able to access the many sub-sets of data that a detailed workorder (or quote or PM etc) report template has.
•It is suggested that you open up the existing sample report templates that come with AyaNova to see how they are designed, as well as check out the answers to questions about report template design in the AyaNova Support Forum and additional sample report templates there that you can download, use as is or customize further
In this tutorial, we want a report template to show parts used in service grouped by the client the workorder was for.
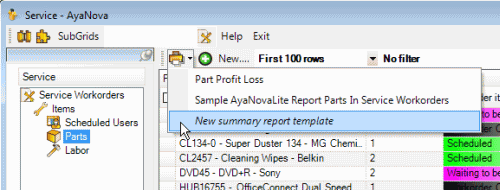
1.Select the Parts grid in the Service navigation pane
a.Select the Print menu option
b.Select the New summary report template to open the internal report designer for a new report template
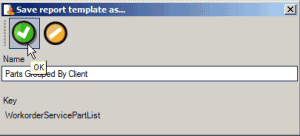
2.Enter in the report template name Parts Grouped By Client
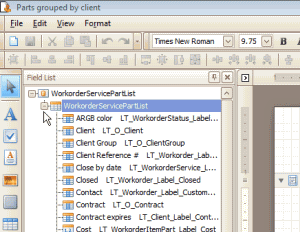
3.The internal report designer opens for a new report template
4.To see what data fields are available with this report template, select the Fields tab, and expand the dataset. This is just to show you where else you can drag the datafields from in addition to using the Wizard
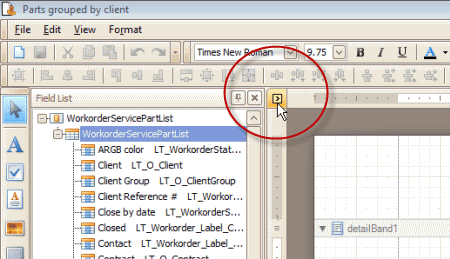
5.In the design panel, in the upper left hand corner, click on the ![]() for a list of report tasks available for this report template, and click on the Design in Report Wizard....
for a list of report tasks available for this report template, and click on the Design in Report Wizard....
6.The Wizard defaults to Standard Report selected. Select Next >

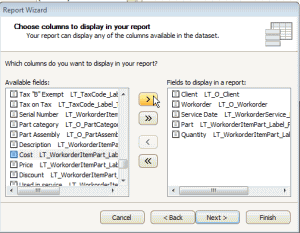
7.Now we will select the columns we want to display in the report.
8.Select Client and move this column to the right.
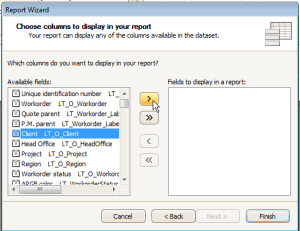
9.Do the same for Workorder, Service Date, Part, and Quantity. Then select Next>
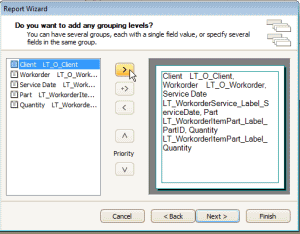
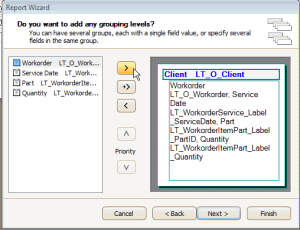
10. The next screen of the Wizard is if you wish to group by any of the selected columns. We want to group by the Client, so select Client and then Next>
11. We will ignore summary values at this time. We do encourage you to try out different scenarios on your own. Select Next>
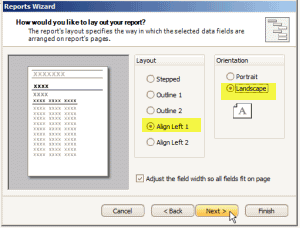
12. Select Align Left 1 and Landscape for the layout, and select Next>
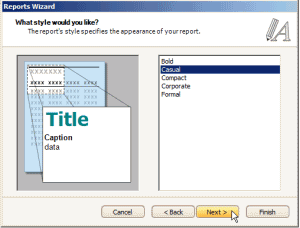
13.Select Style of Causal. Select Next >
14.Enter a title of Parts Grouped By The Client. Select Finish.

15.The Wizard takes the entered information, and creates a report template. Select Preview link at the bottom to see what the report would look like at this stage.
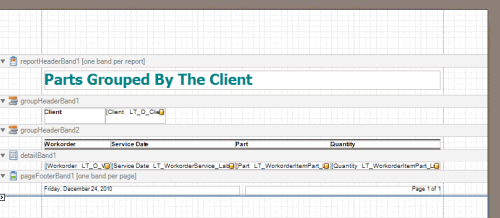
16.As you can see, the label names for data are using the internal data name that you will want to edit. Also you might want to change font or sizing of the fields
17.Select the Designer link at the bottom to return to the Design Panel.
18. Edit the labels for the group headings
a.Select the label control that presently has the text Client O.Client and edit it's Text property so that it is just labeled Client
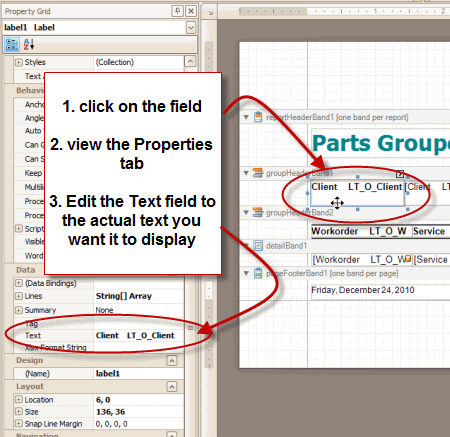
b.Do the same for the other labels such as those that are presently labeled Workorder O.Workorder etc so that the labels show with the desired text
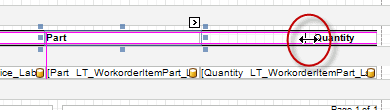
19. There is not enough width given to the Part field, so use your mouse to click and change the width of the Quantity label and the Part label and the Service Date for both the group header and for the detail
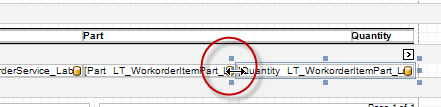
a.Preview so you can see how it now looks
b.Change the width of other fields as you want such as the Client datafield to accommodate client's with long names
c.You can also use the Properties tab to change the width etc. Select the field you want to edit, and then adjust the Layout properties
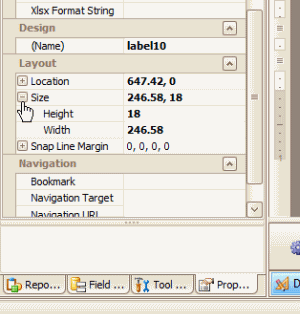
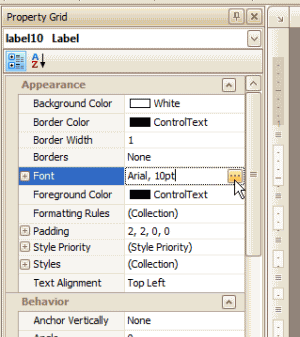
20.Edit the font of fields in a similar fashion - select the field in the design panel, view that field's Properties, and edit from the Appearance properties
21. Save the report template once finished. It will now appear for selection in the Part's grid of the Service navigation pane.
As As with any report template, if you only want specific records to display on the report when printed, first filter the grid so that it only shows the records you want to report off of. Also see How do I filter a grid and print a report for the records that show?