Before importing or exporting contacts, you will first want to map phone and address fields between AyaNova and Outlook.
This "tells" the OLI plug-in what fields in the Outlook contact entry screen match up with what fields in the AyaNova entry screen.
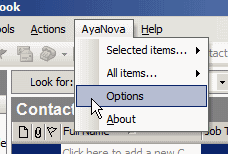
1. From any AyaNova menu, select Options
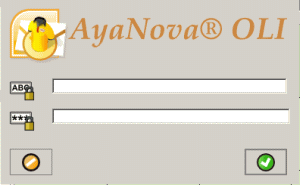
2. If you have not yet been asked to log in via OLI (as have not selected any other menu option since running this session of Outlook), than the OLI login window will appear. Log in as an AyaNova user.
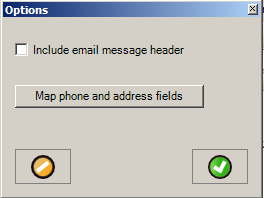
3. Select the Map phone and address fields
4. The Map phone and address fields entry screen appears
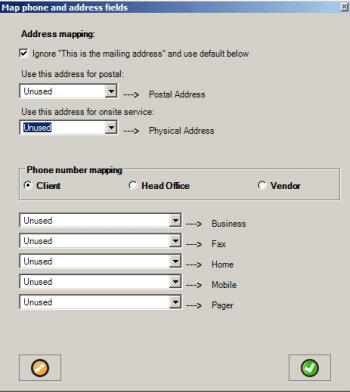
Address mapping fields
![]()
Ignore "This is the mailing address" and use default below
This is only used when exporting contacts *to* AyaNova.
In an Outlook contact, there is a checkbox for a field called "This is a mailing address" that if you checkmark makes that address (either Business, Home or Other) as the "mailing address" according to Outlook.
If not check-marked (false), when exports a contact to AyaNova and needs to set the Postal address in AyaNova it will use the Outlook address that has a checkmark in the "This is the mailing address" field. Note that it's possible to have none of the three addresses with a selection for "This is the mailing address" in which case OLI falls back to the user selected mailing address.
If check-marked (true) then it simply uses the address the user selected as the postal address and it makes no difference which Outlook address has that checked.
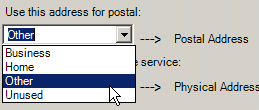
Use this address for postal:
Select which Outlook address maps to the AyaNova Postal Address
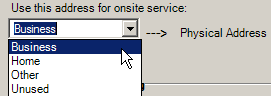
Use this address for onsite service:
Select which Outlook address maps to the AyaNova Physical Address
Phone number mapping fields

Select which AyaNova object setting the phone number mapping for
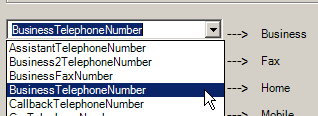
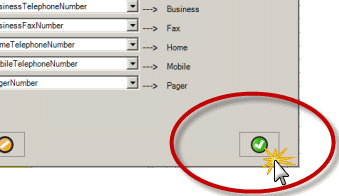
Select the Outlook number you want to map to each of the AyaNova phone fields.
5. Click on the OK button to save your mappings.
6. Additional information on where the mappings are saved:
All information once entered for the Map Phone And Address Fields option above is saved in a file called user.config by Outlook. Location of the user.config file varies on computers depending on the profile directory for that operating system.
On an example older OS such as an XP station, the profile directory is C:\Documents and Settings\username\Local Settings\Application Data\ so the user.config file is created in the C:\Documents and Settings\username\Local Settings\Application Data\Microsoft_Corporation\DefaultDomain_Path_ykkp3qrq5gwiowao2hxg0jyh0jikbl1q\11.0.8312 folder
If ever you want to reset all mappings back to nothing without having to select as such, you can do a search on your computer for the user.config file, open it using NotePad to confirm it is the correct file and than delete the file user.config. The next time you edit the mappings, the file will be newly created.